
- Home
- Guides
Set up Lockership, step by step
Short guides with screenshots from the app and from Shopify.
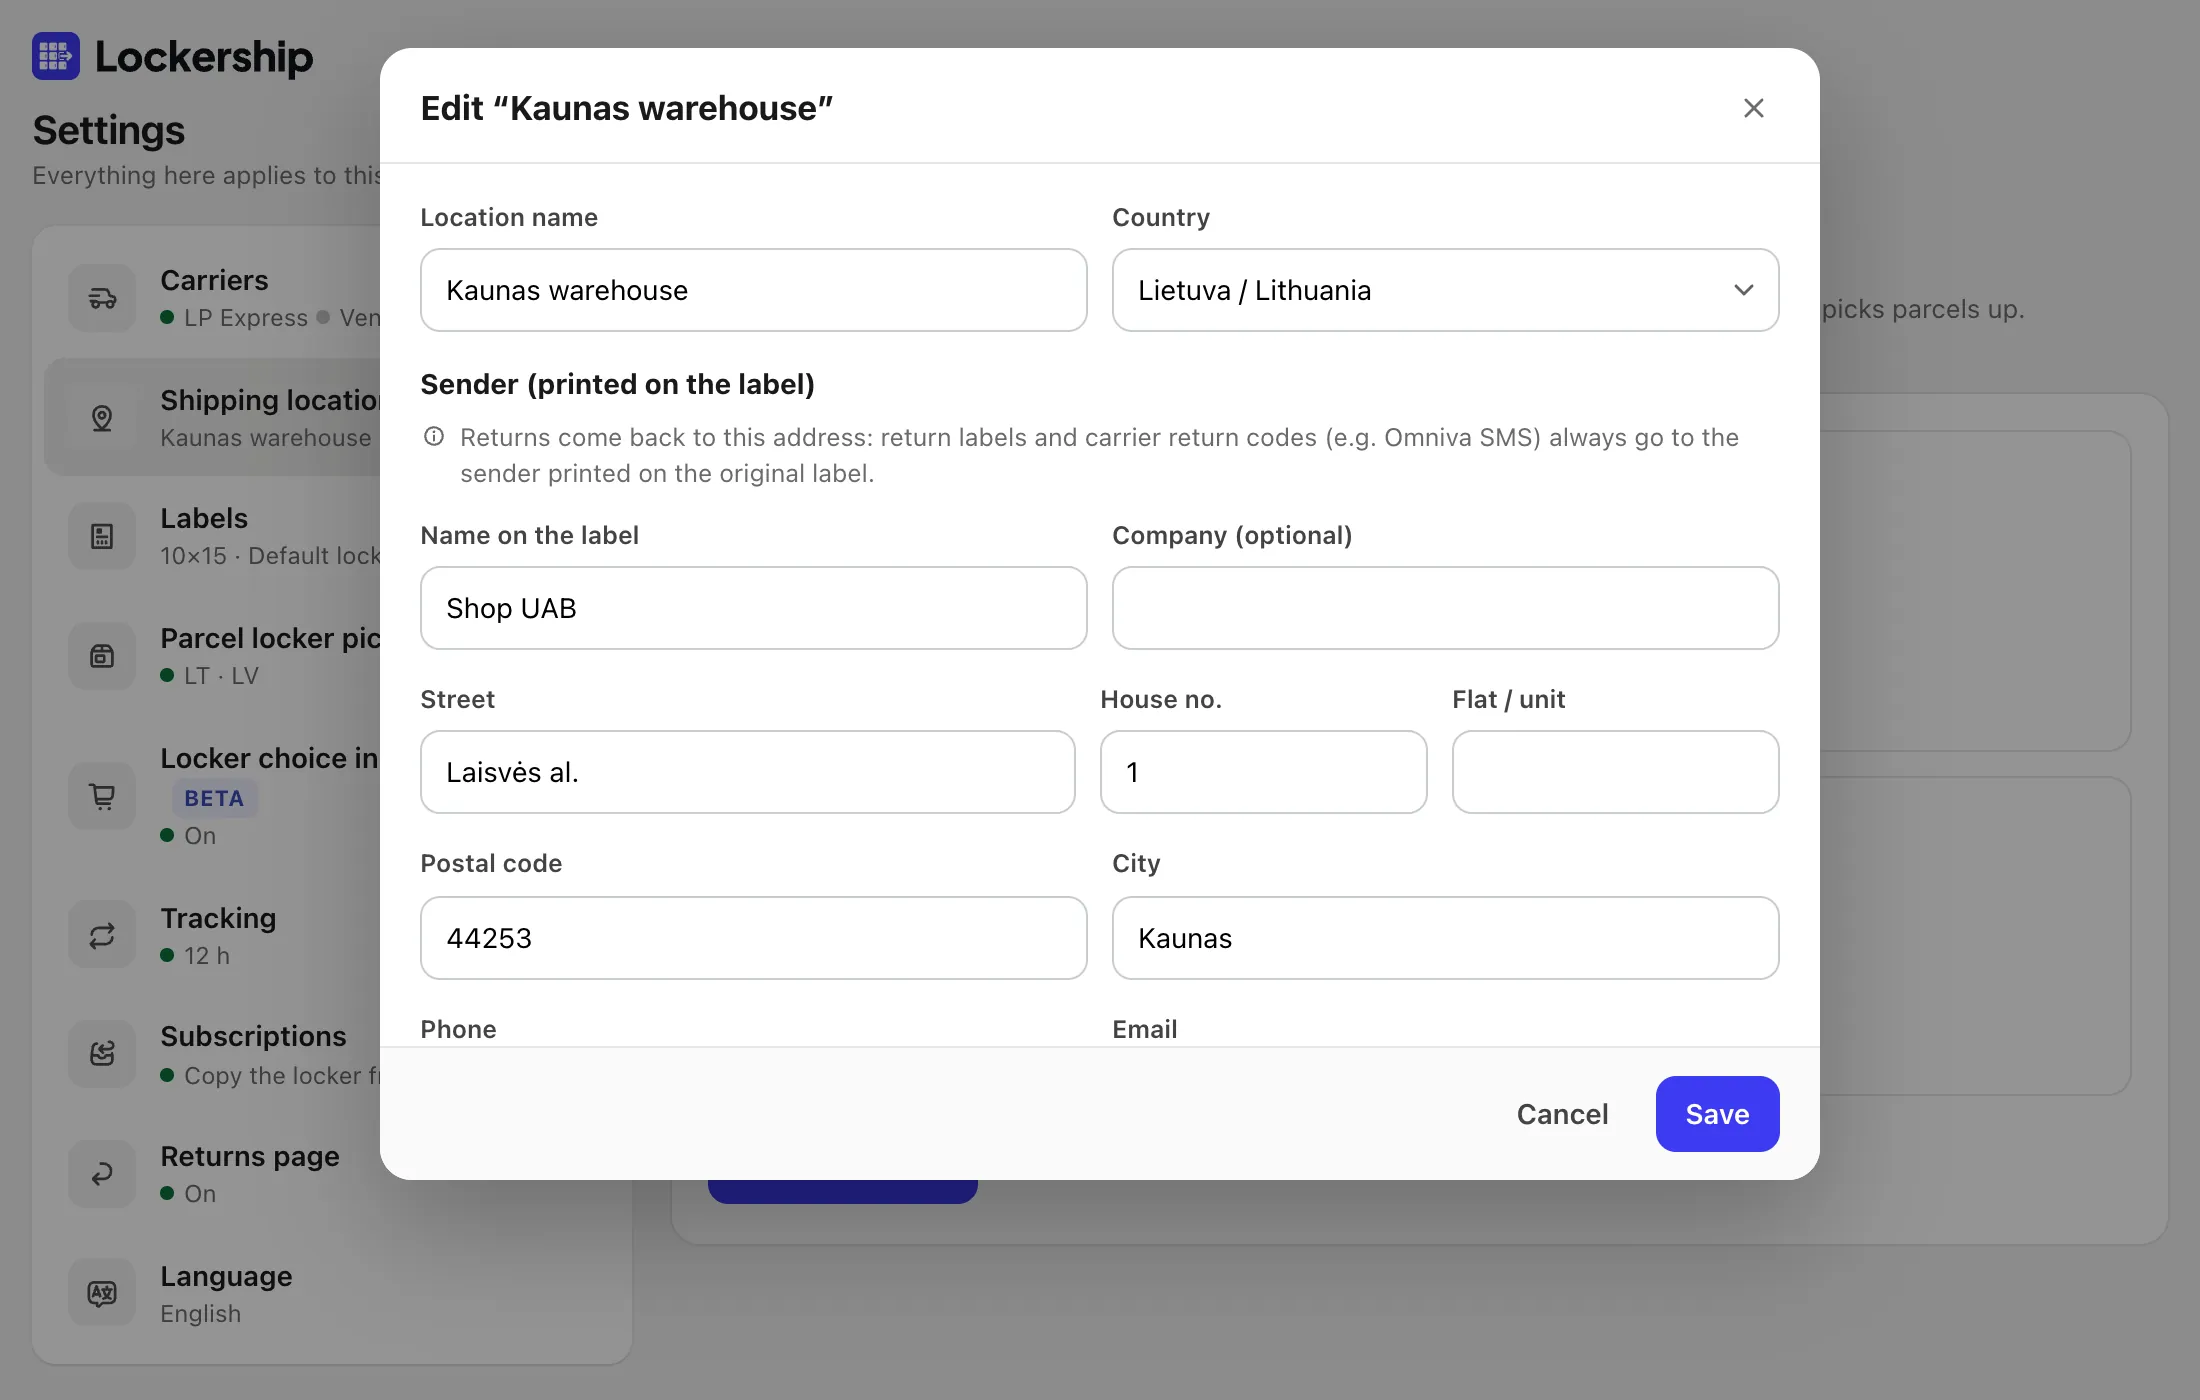
Install and first setup
Before the first label, Lockership needs to know where parcels ship from. That address also decides where returns come back to.
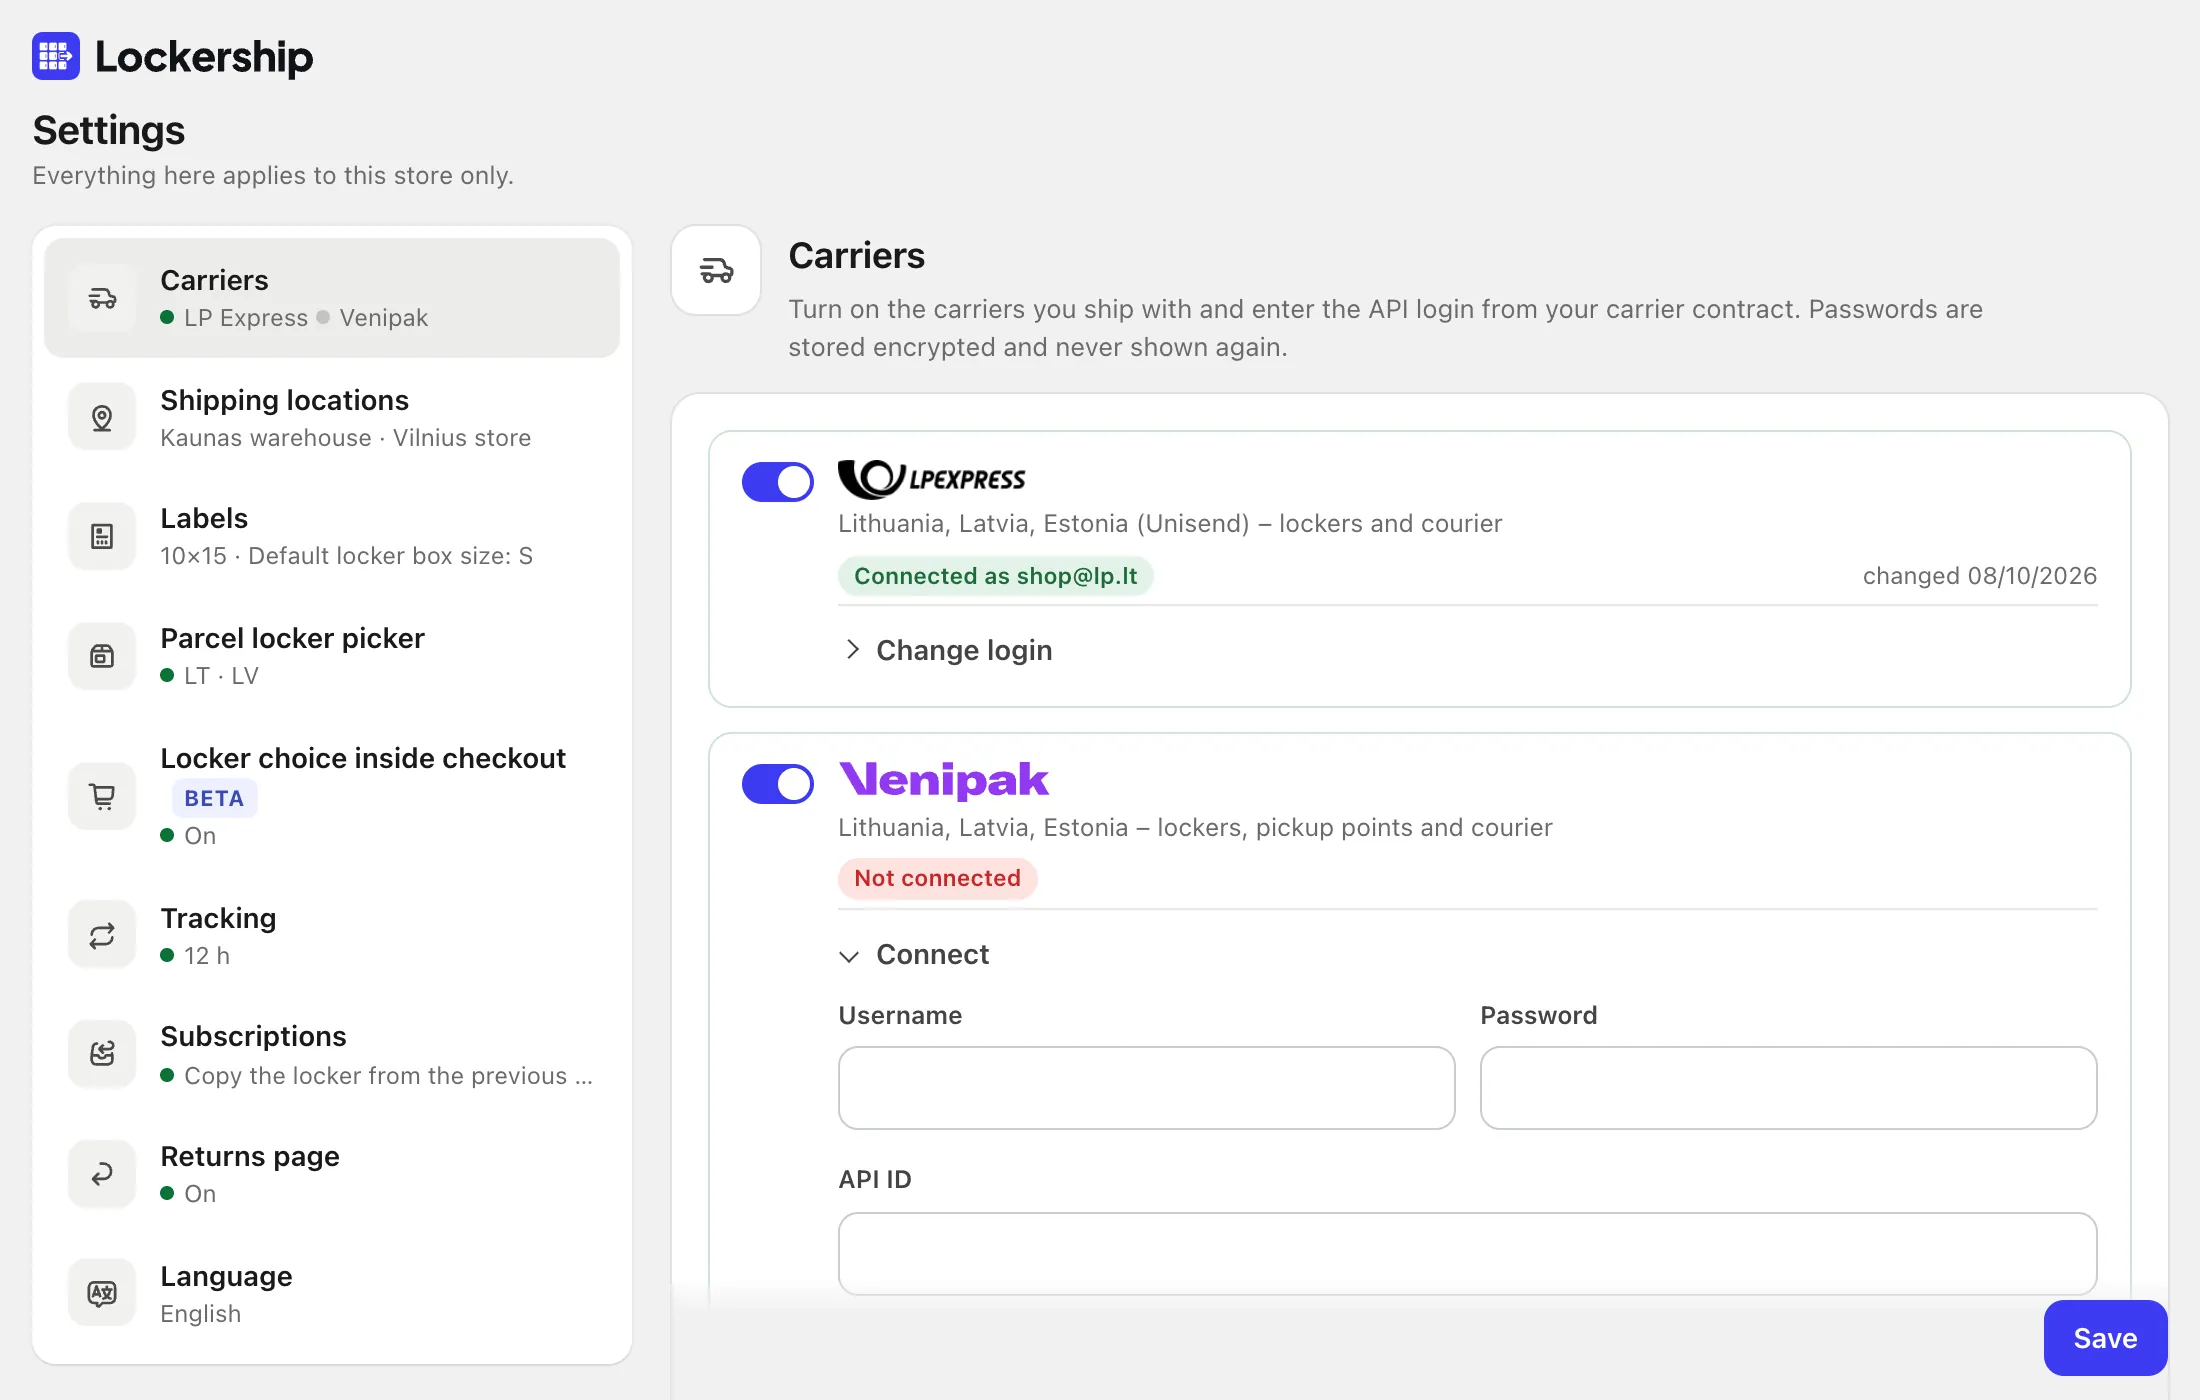
Connect your carriers
Lockership makes labels through your own carrier accounts. Each carrier needs its own login, entered once in Settings → Carriers and checked with “Test and save”.
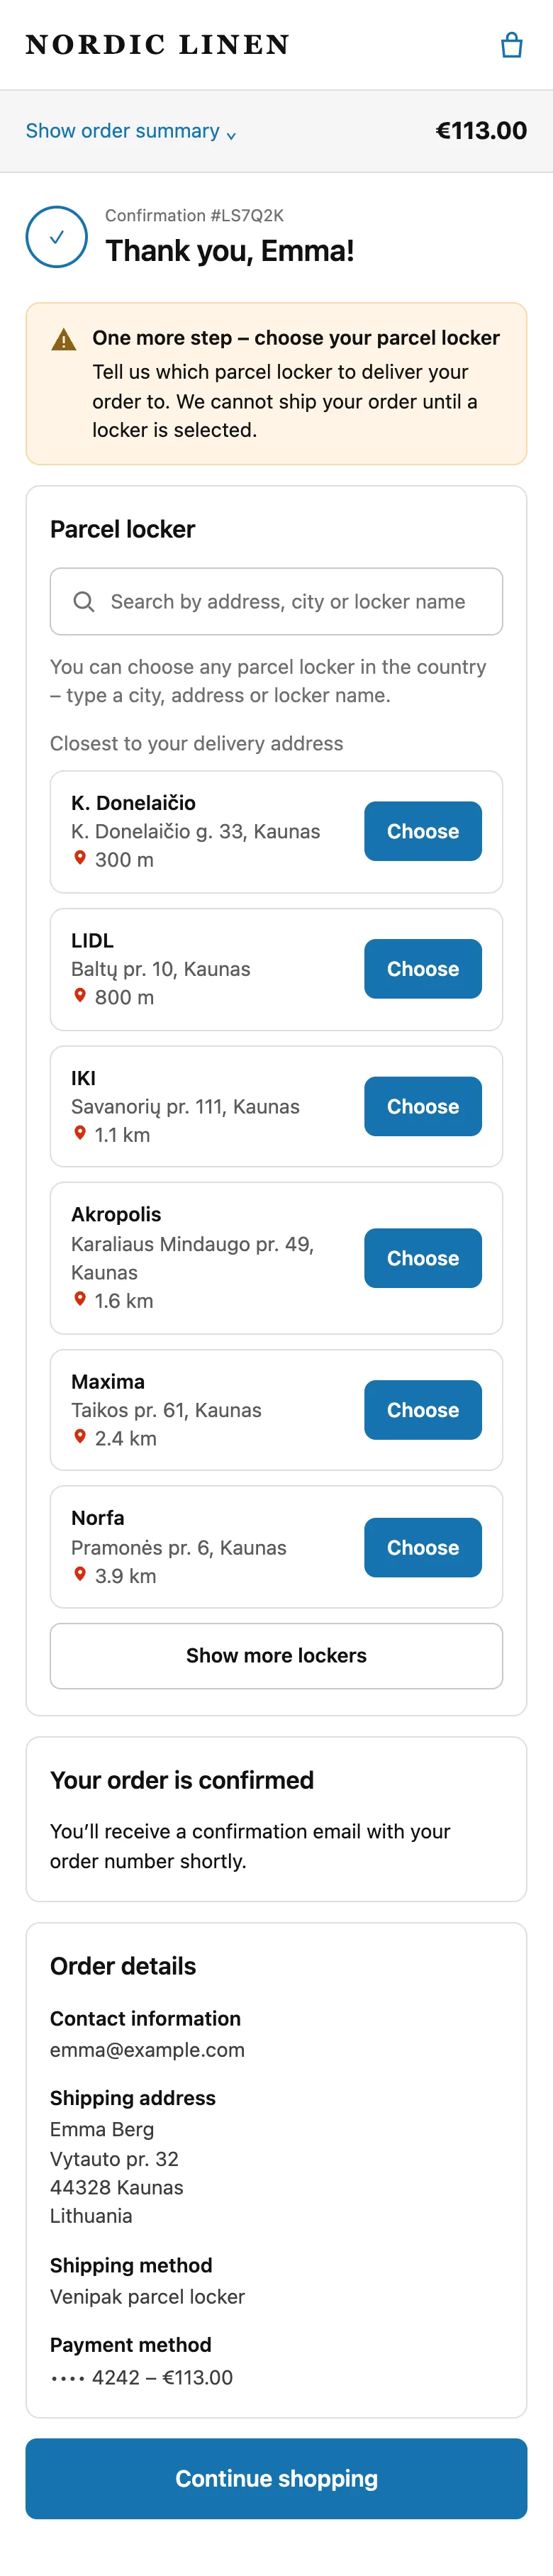
Locker picker after payment
Works on every Shopify plan. Buyers who chose locker delivery pick the exact locker right after paying, and the choice is saved on the order.
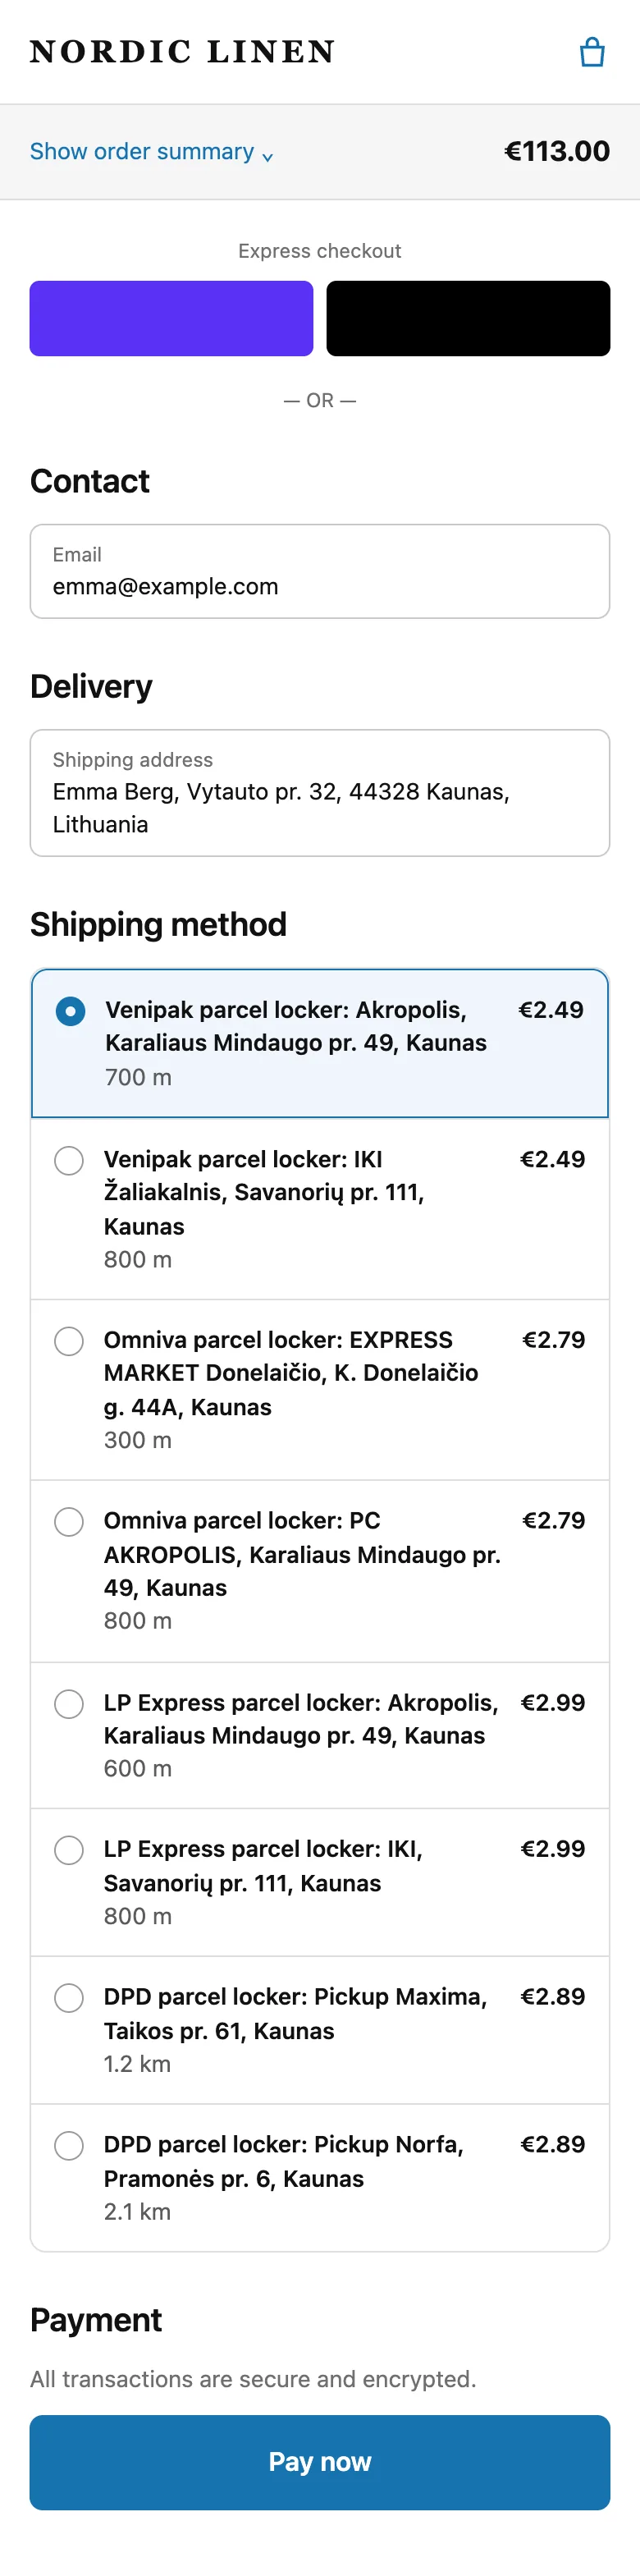
Lockers inside checkout
The buyer picks the locker before paying. This uses Shopify’s carrier-calculated shipping, so it depends on your Shopify plan. On other plans, use the picker after payment.
Labels, courier and manifests
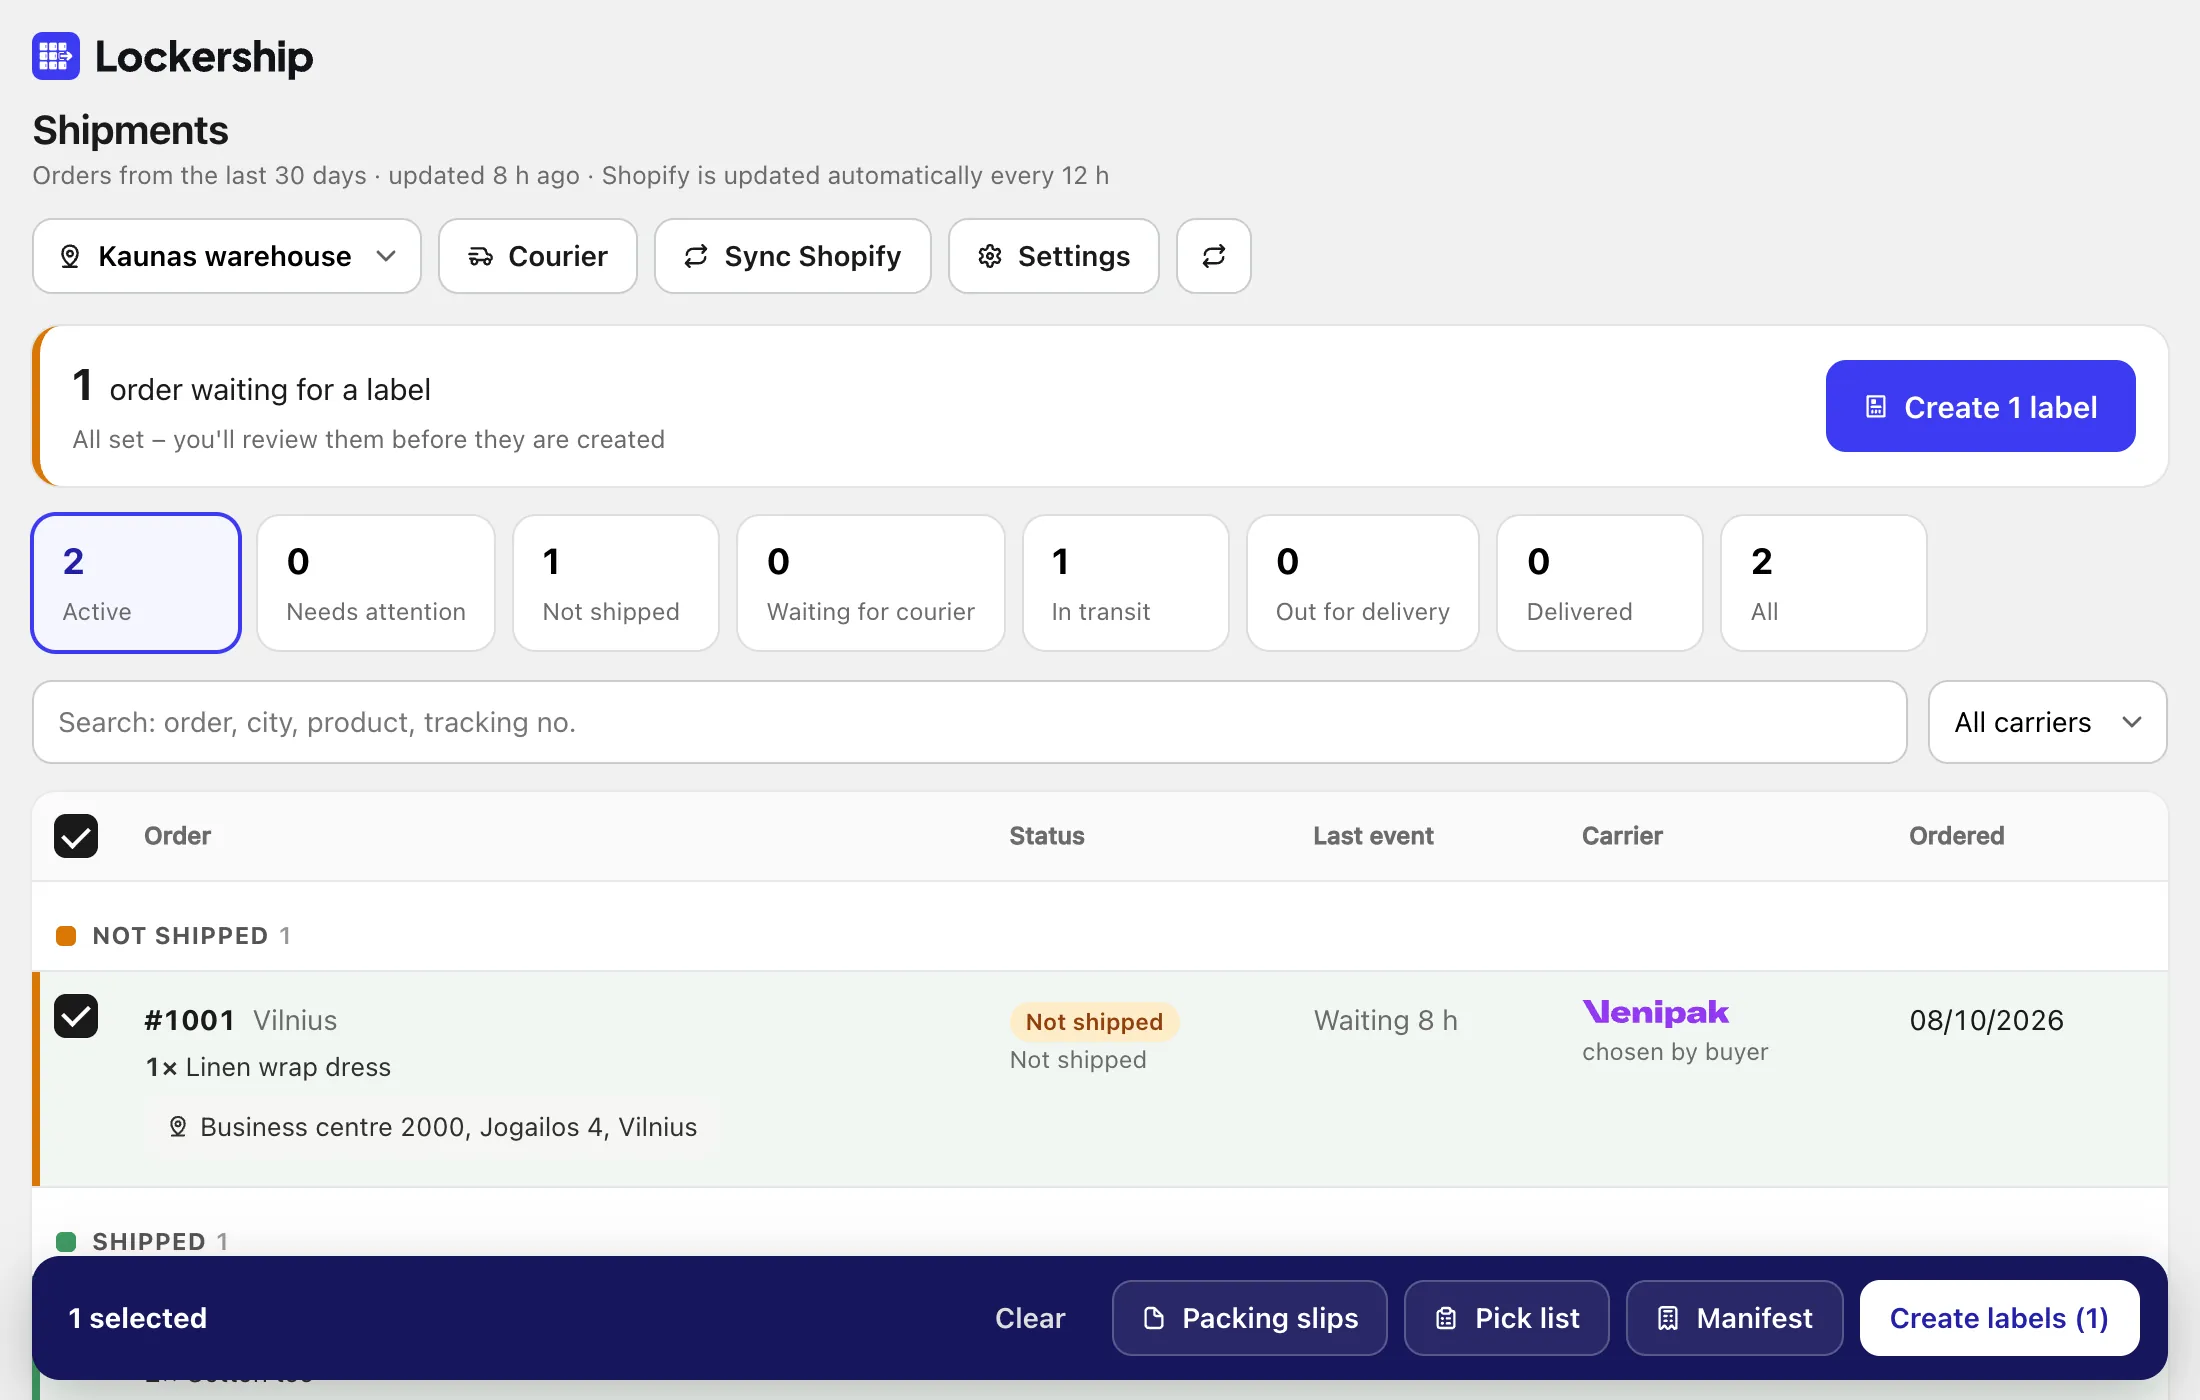
The daily routine in Lockership: tick the orders, check the review, print. Everything happens in the Shipments list.
Set up the returns page
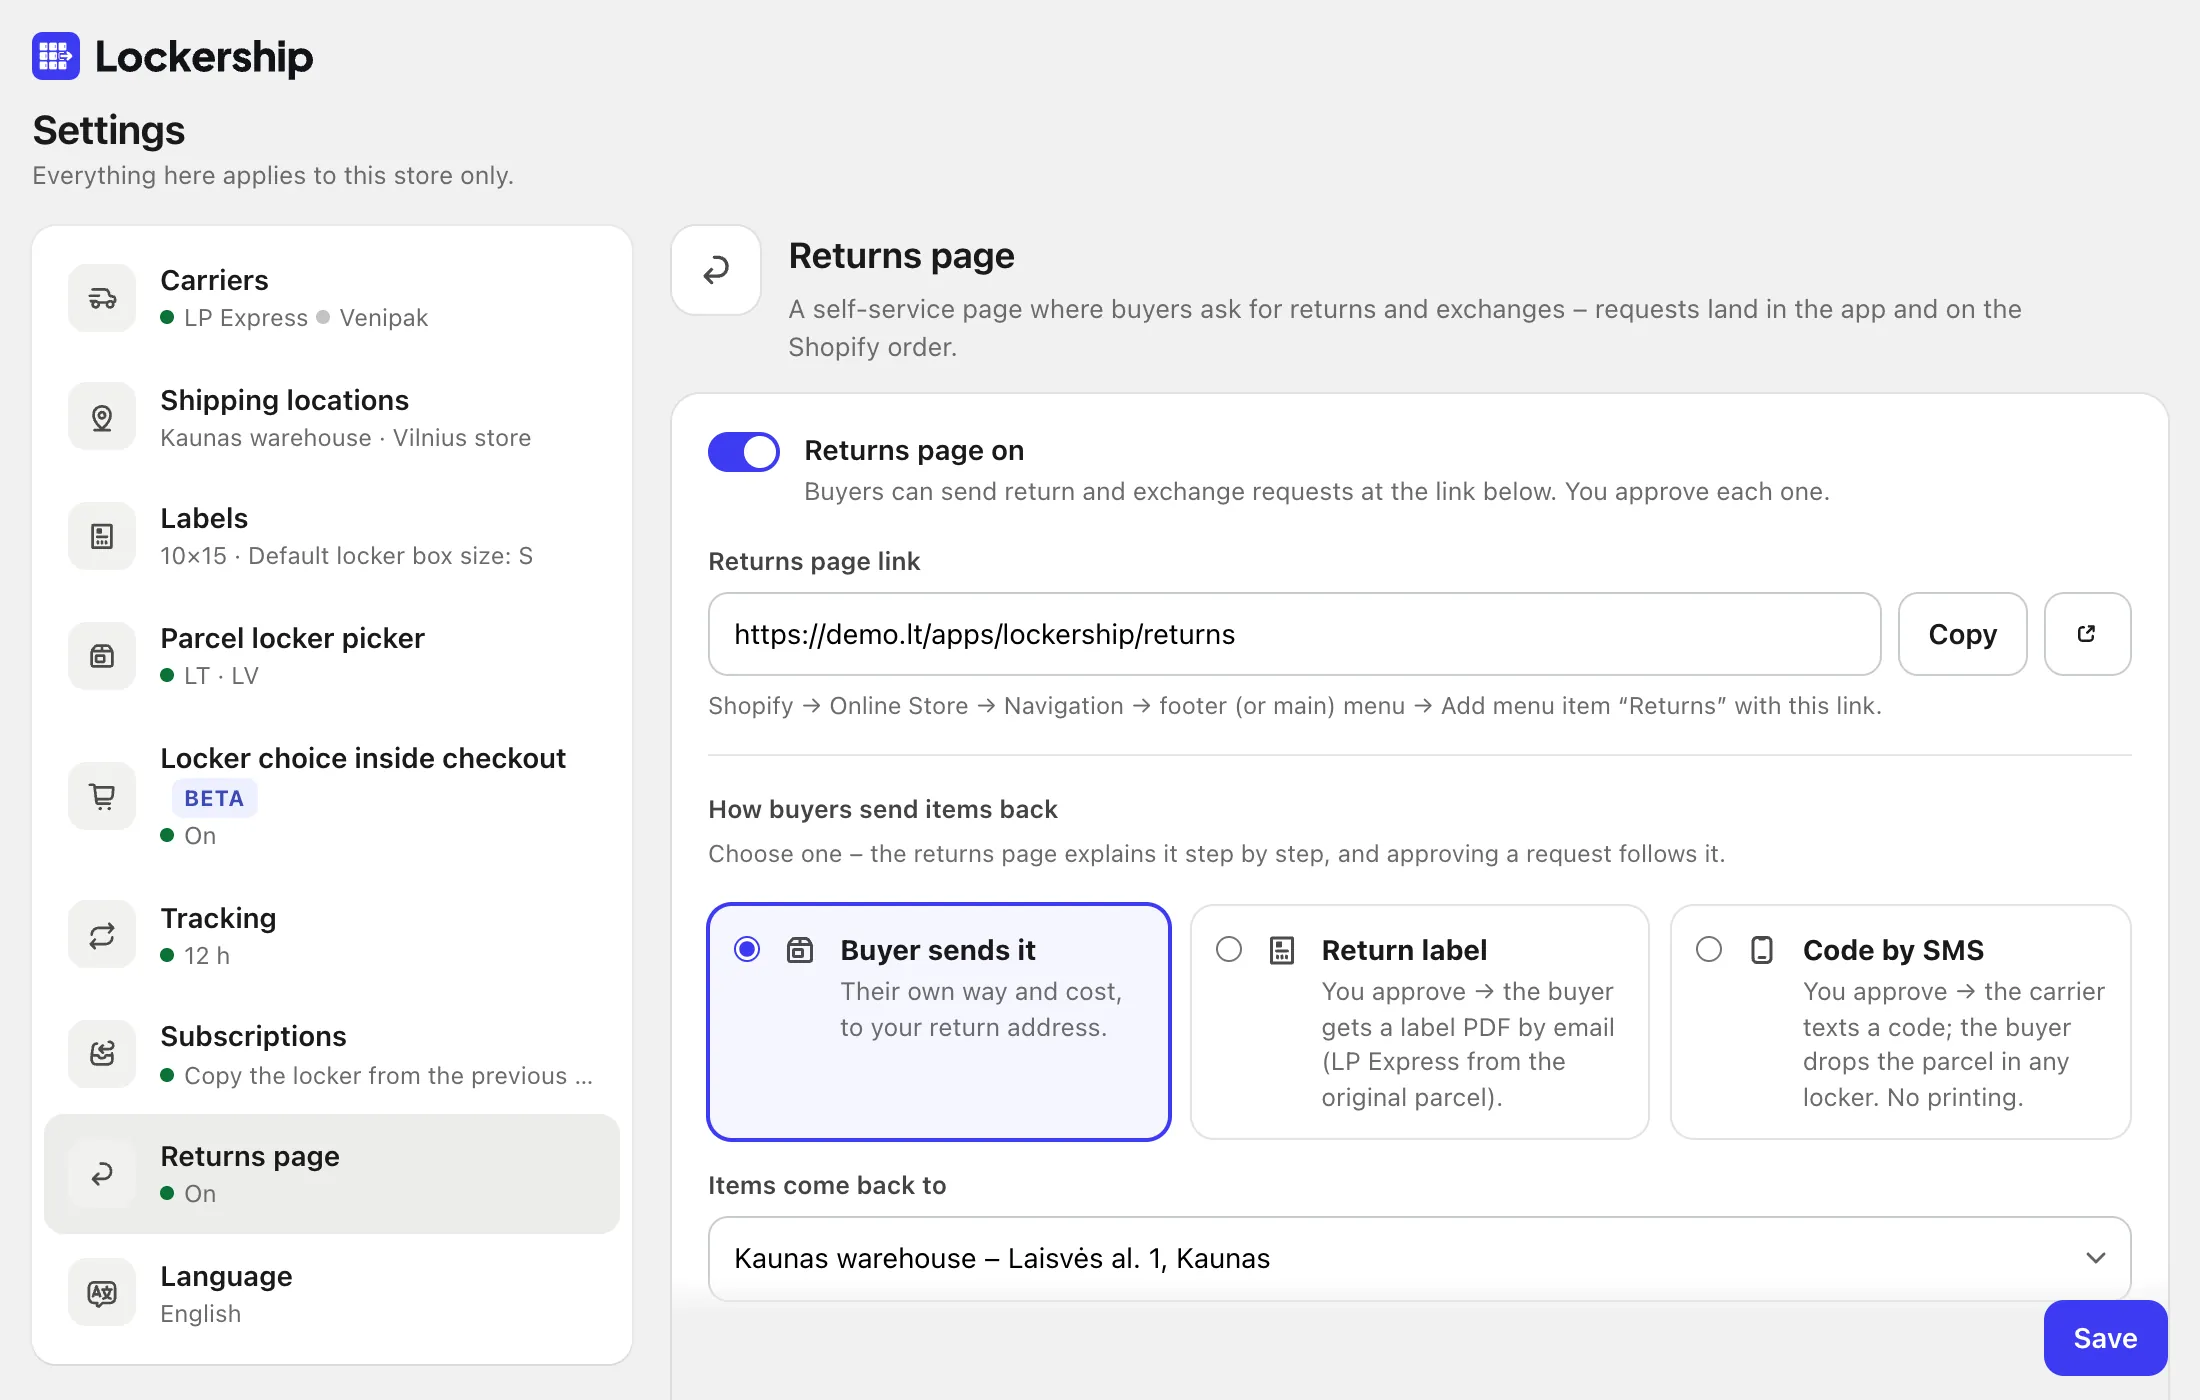
Turn it on, choose how buyers send items back, and add the link to your store menu.
Exchanges
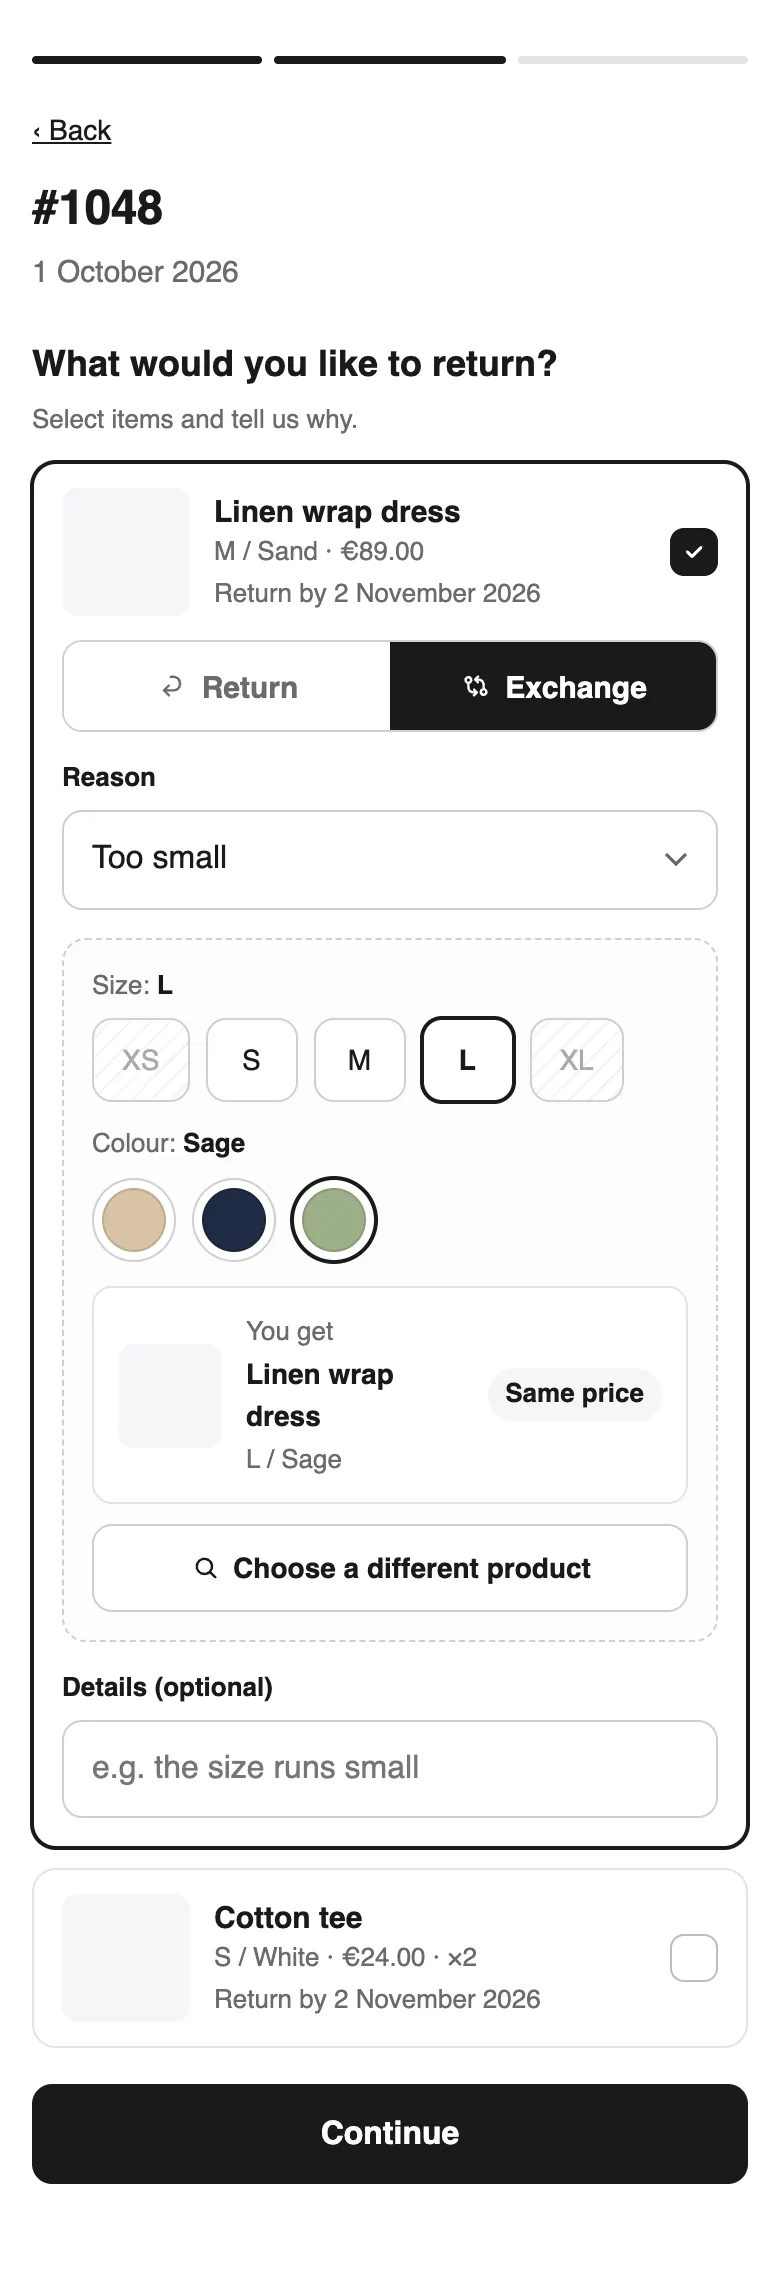
The buyer picks the new size, colour or product on your returns page. You approve, receive the old item and ship the new one.
Try Lockership on your store before it reaches the App Store
We are starting with a small group of Shopify stores in Lithuania, Latvia and Estonia. Leave your email, and I will help you connect your carriers.